|
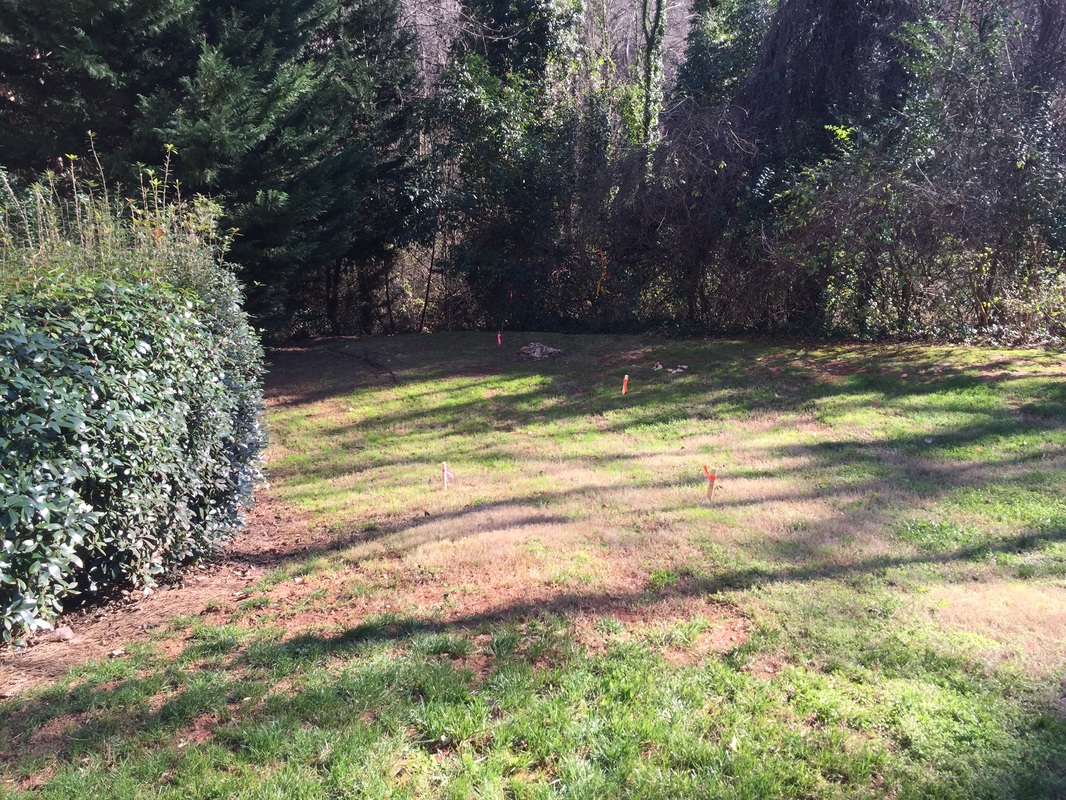
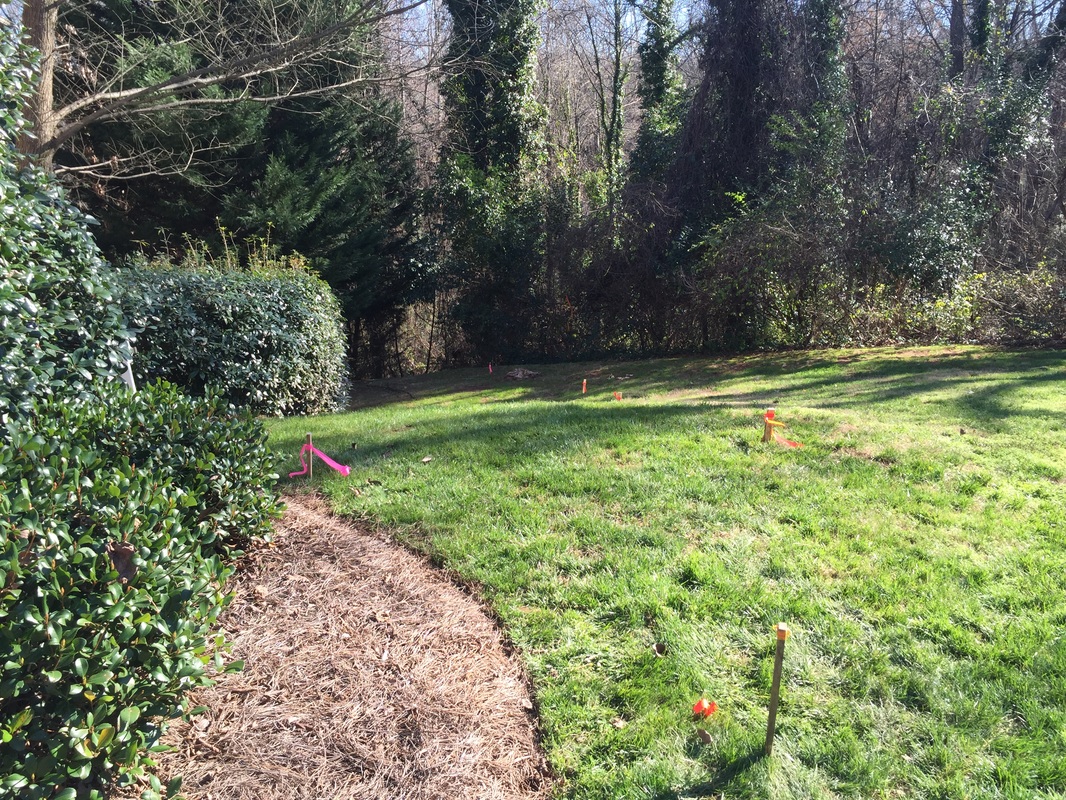
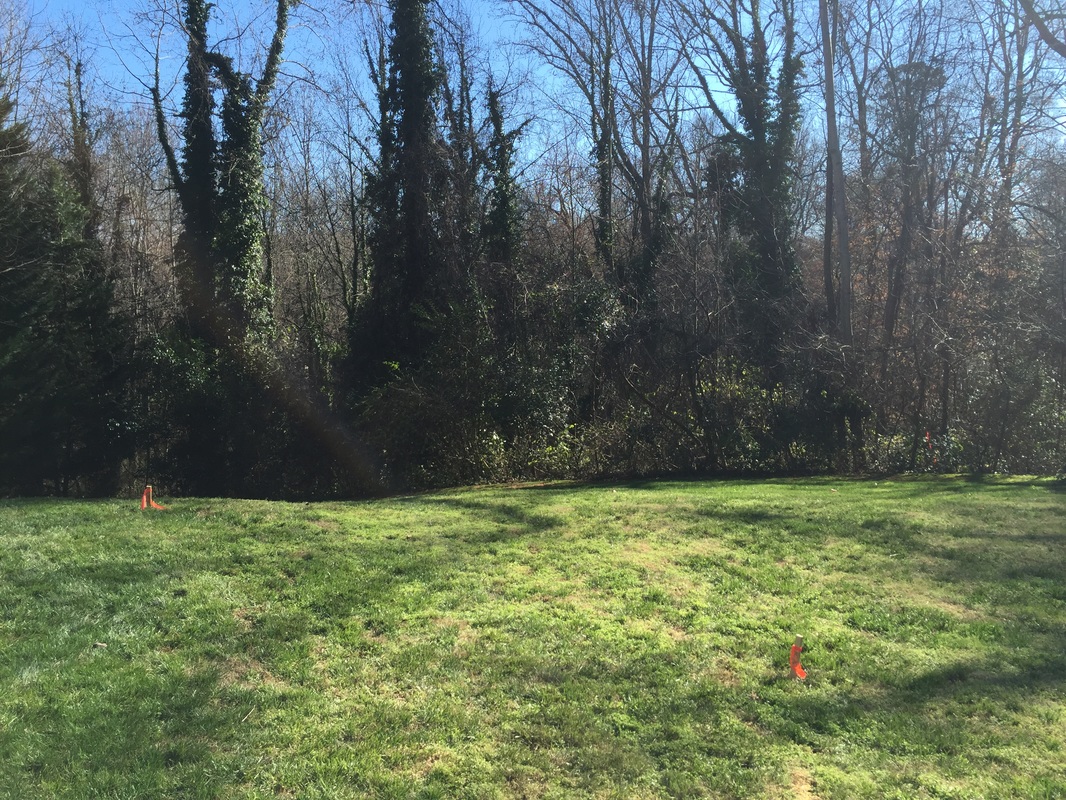
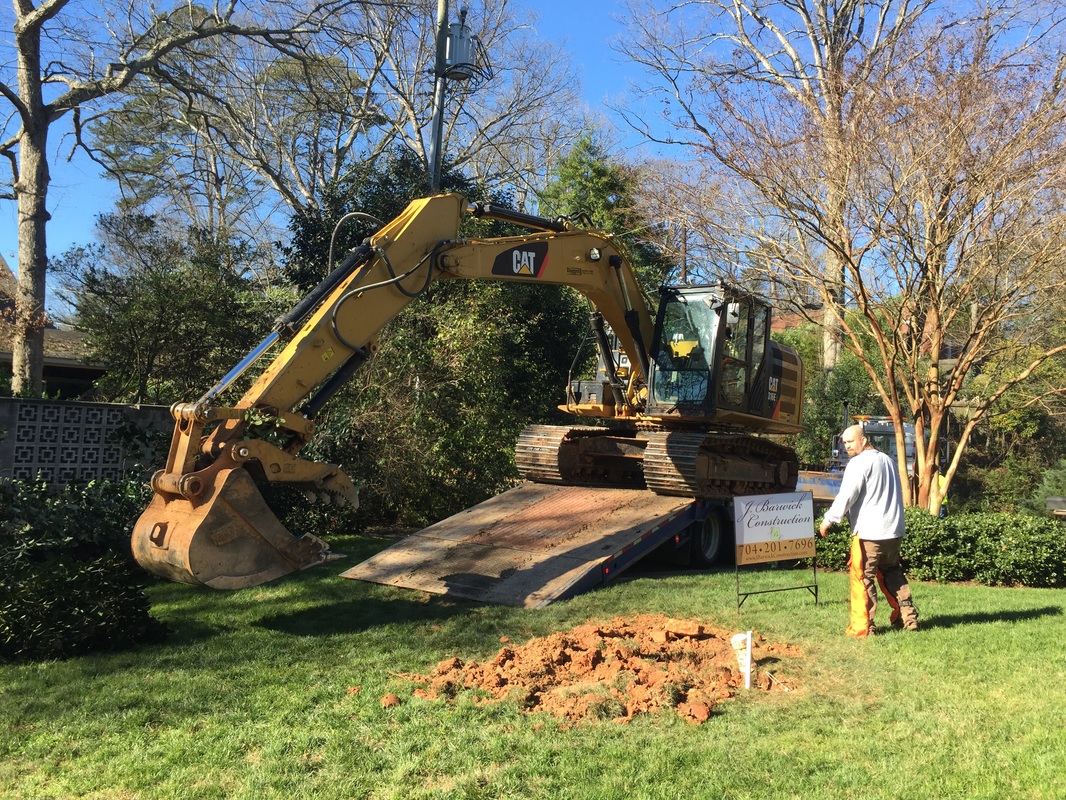
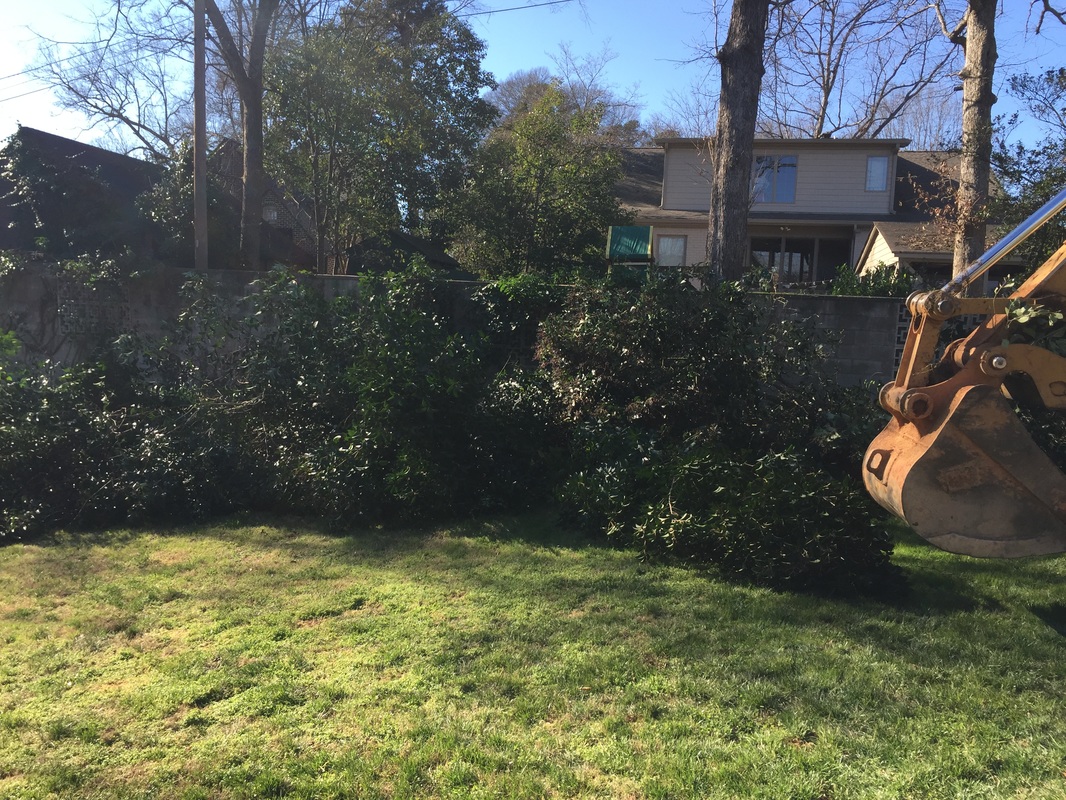
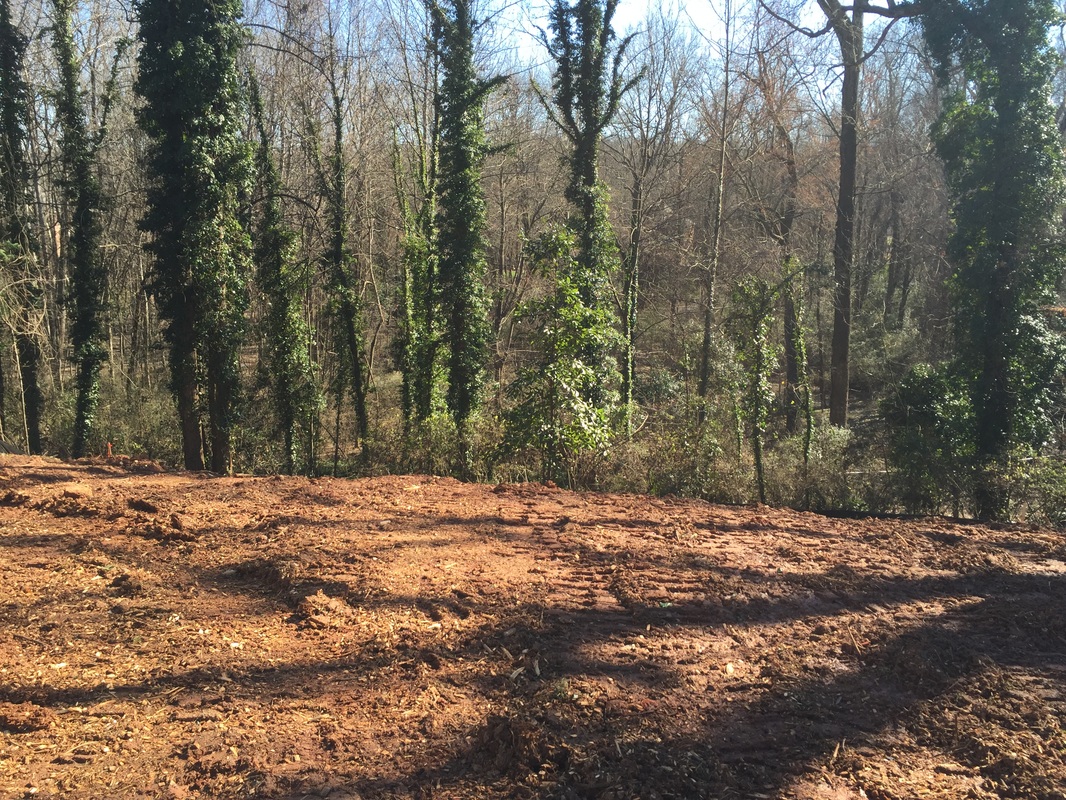
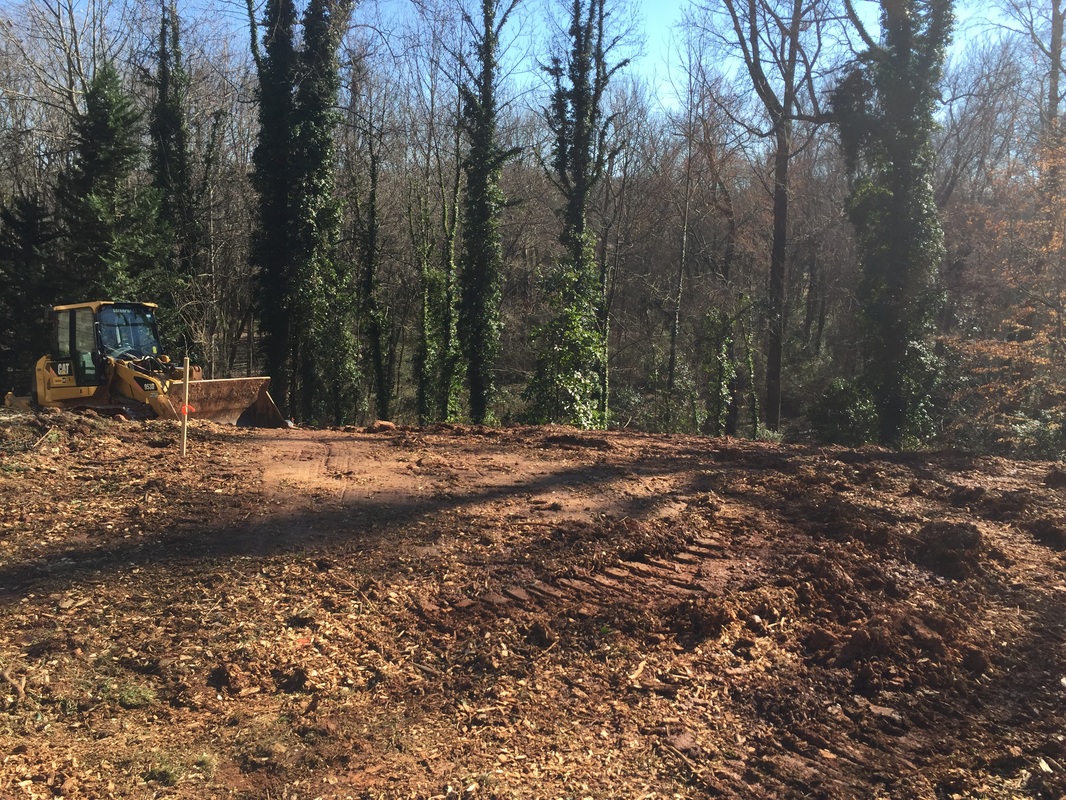
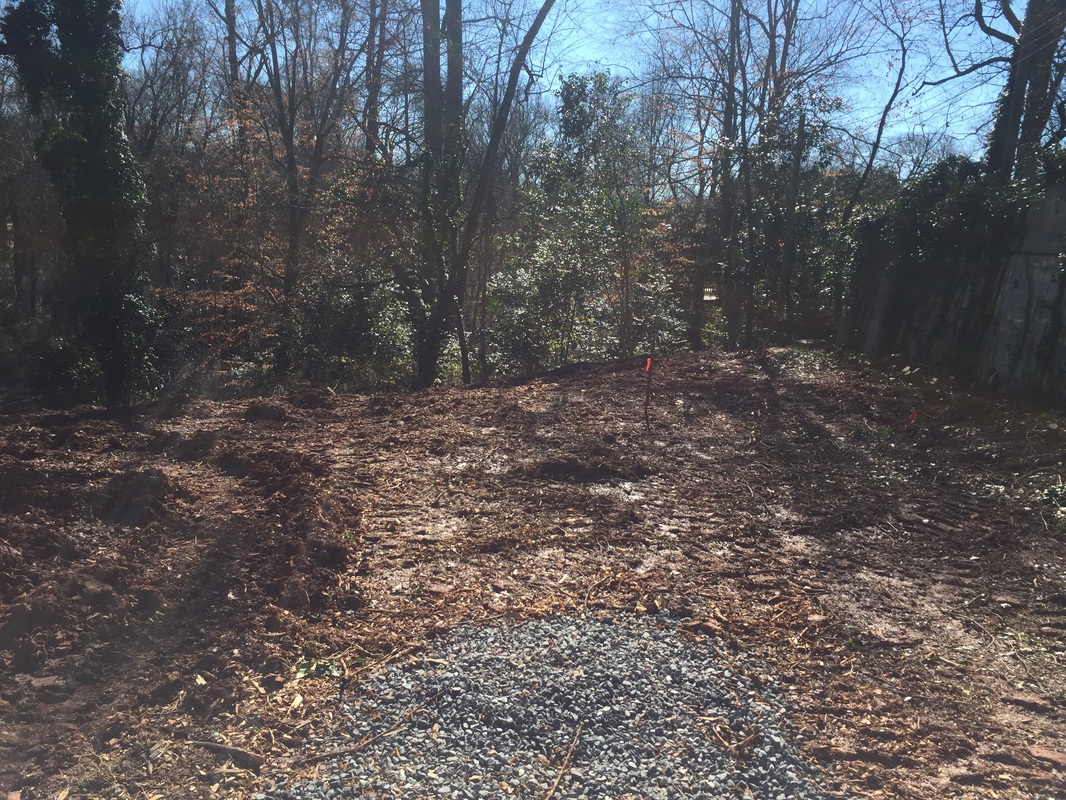
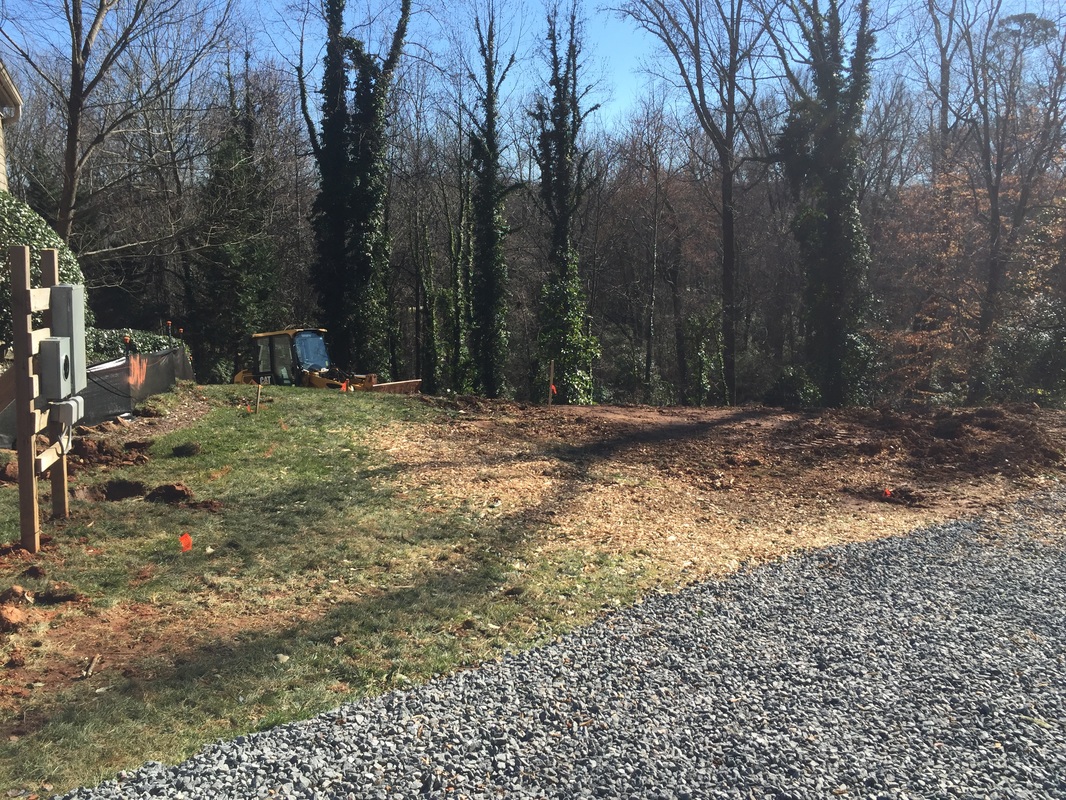
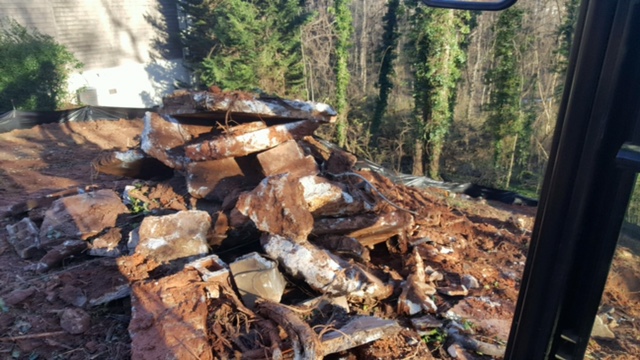
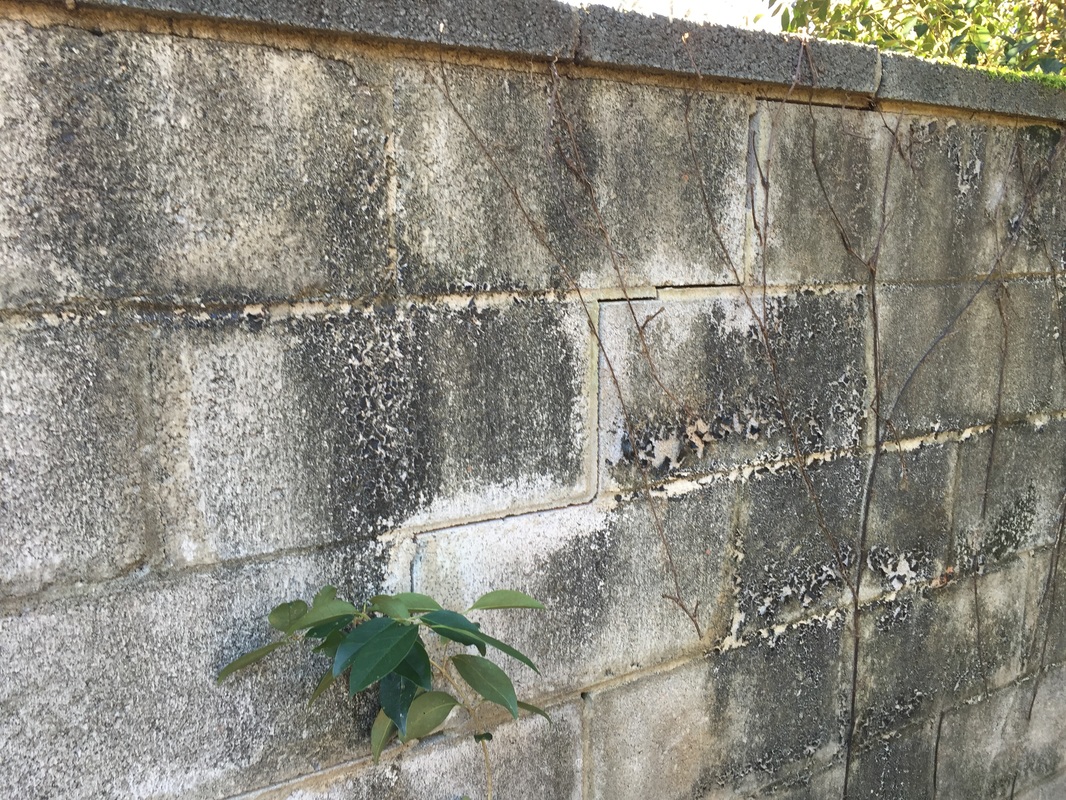
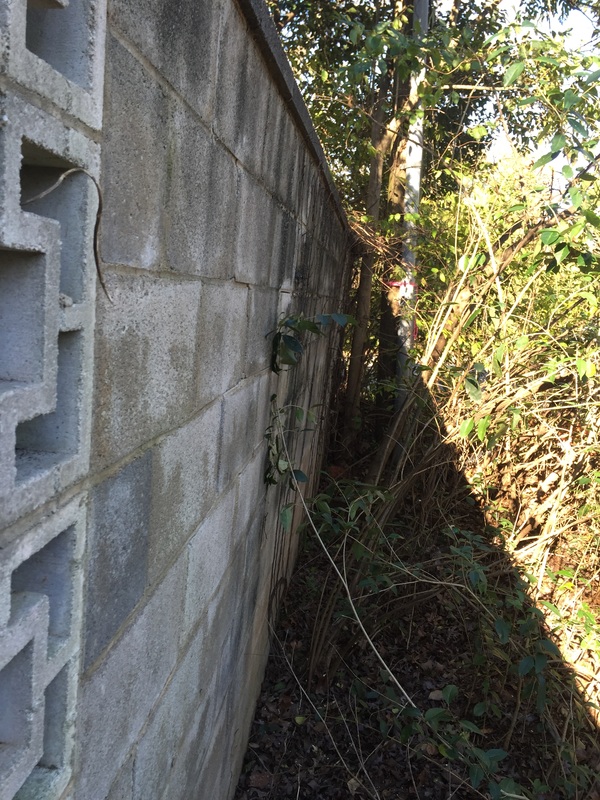
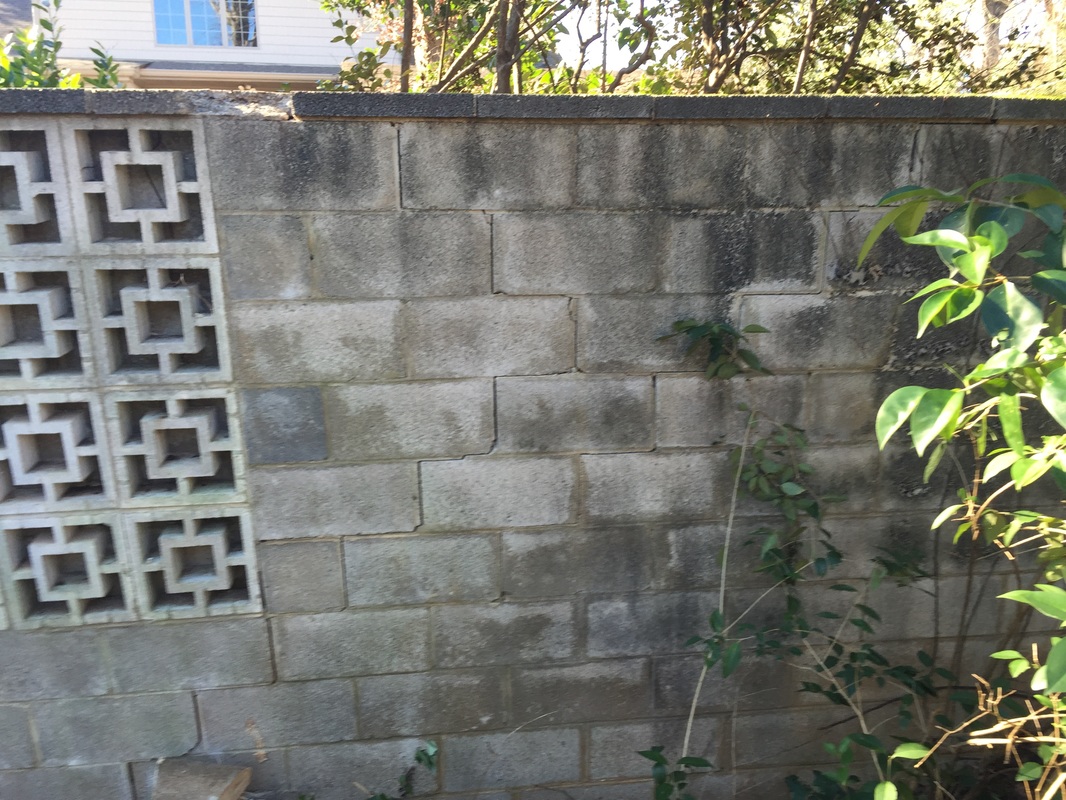
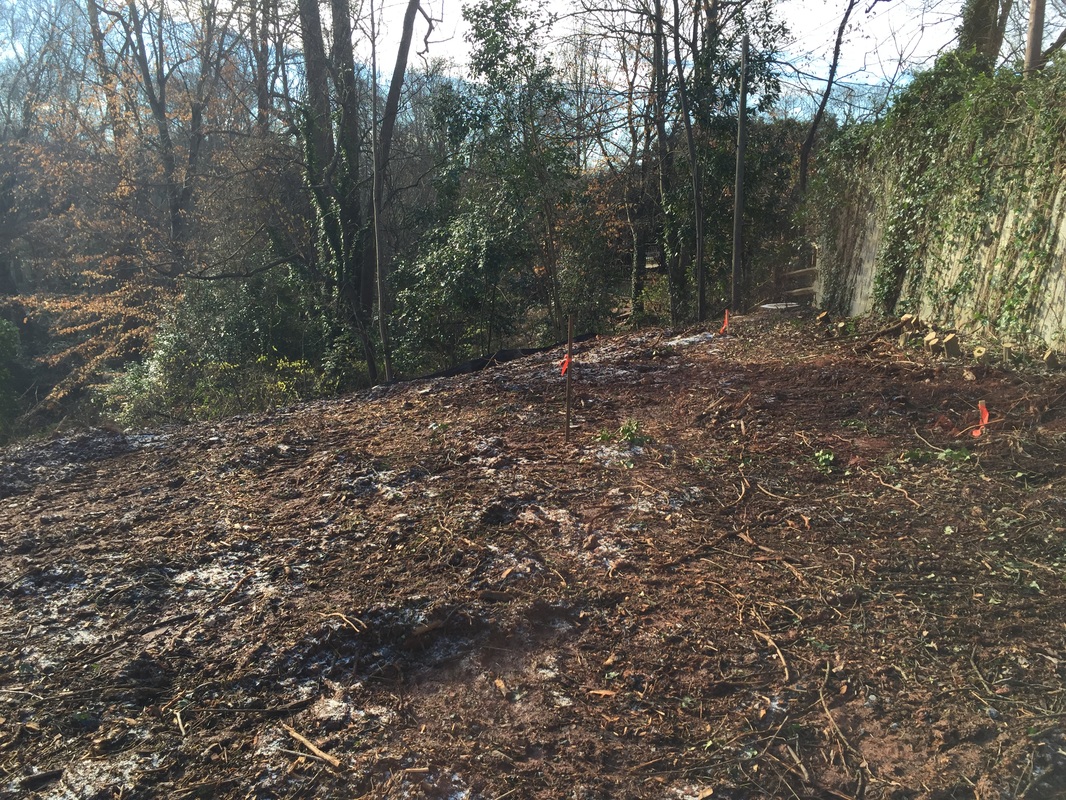
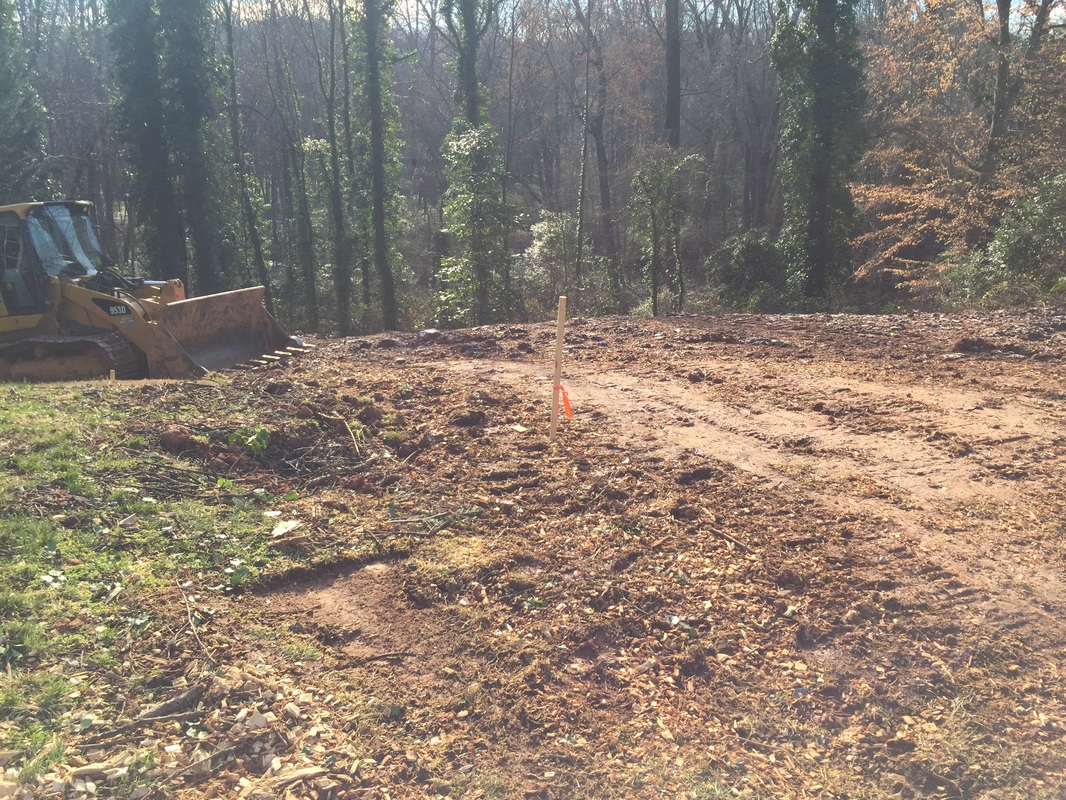
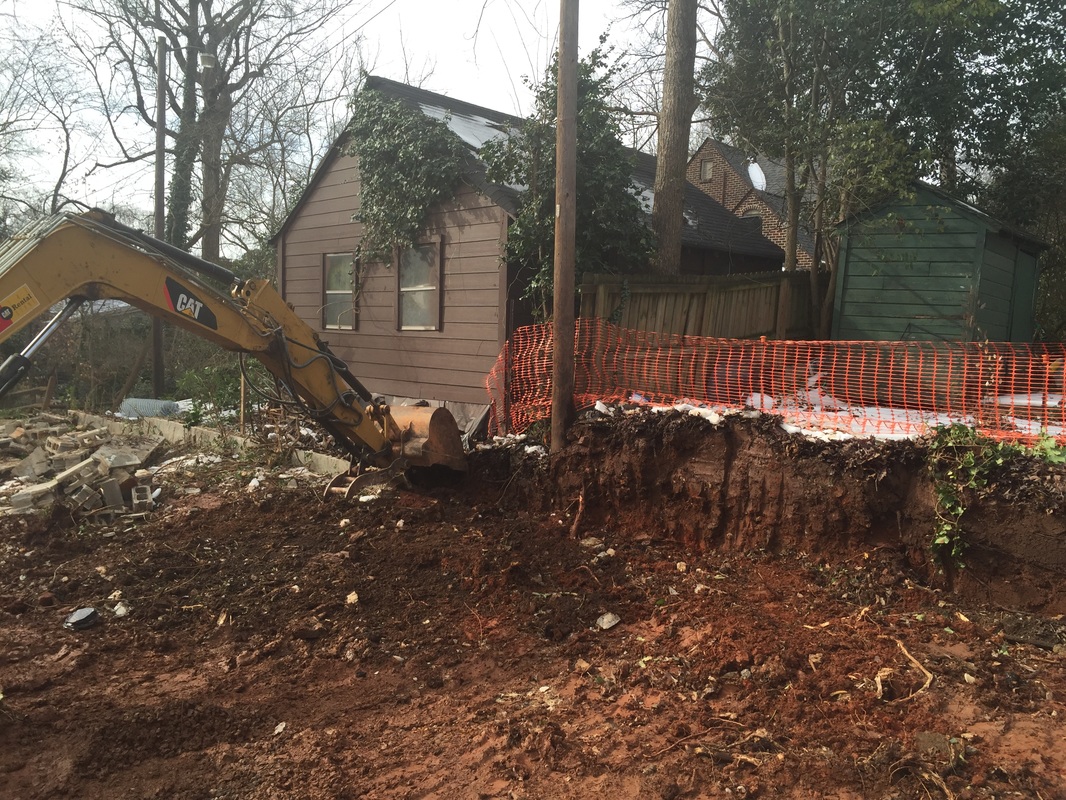
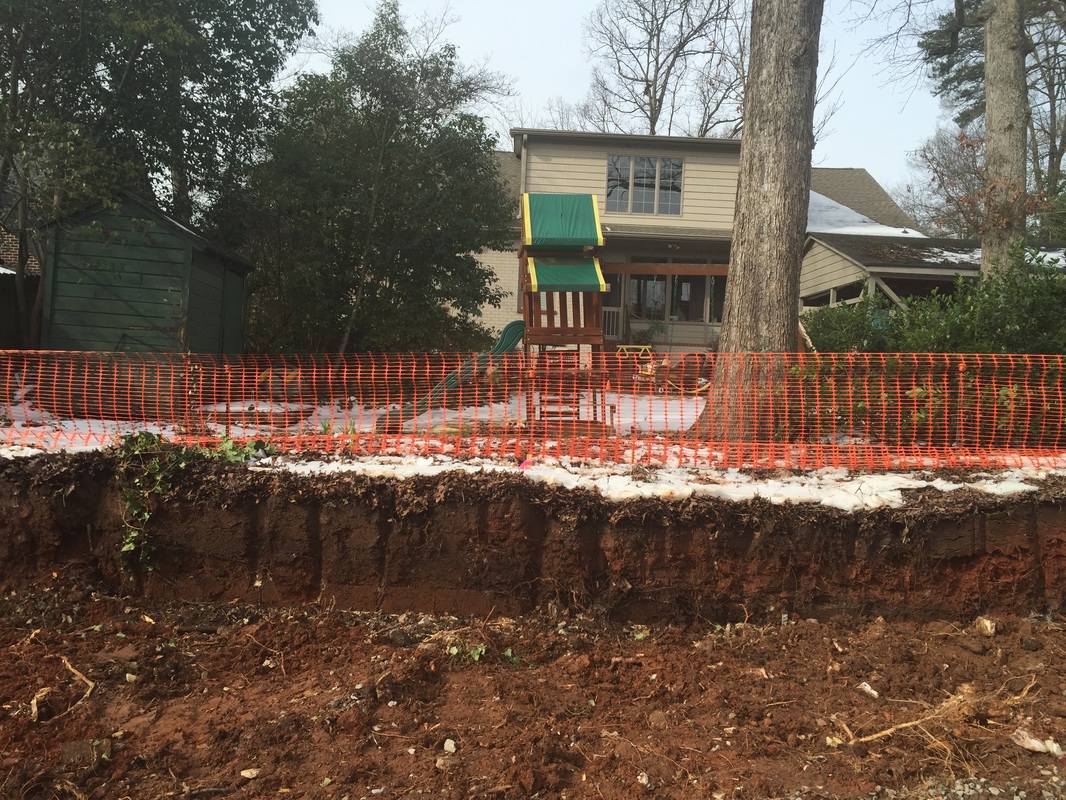
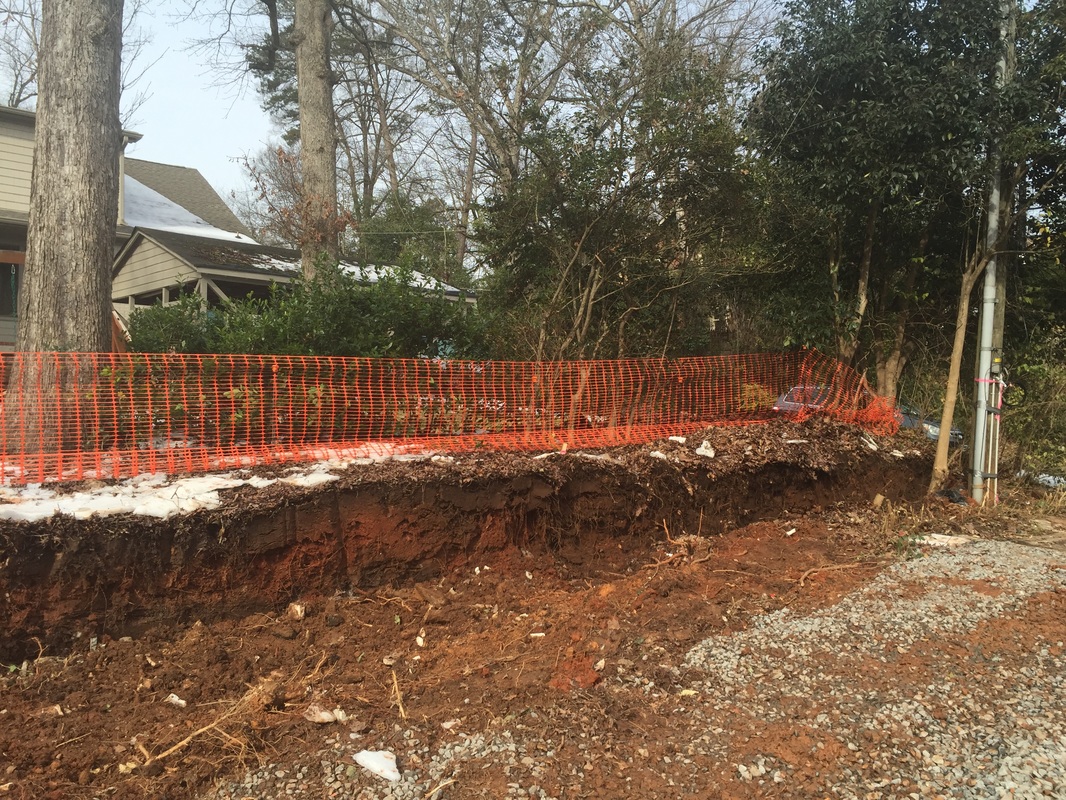
Infill Custom Home Being Built in Charlotte, North Carolina J. Barwick Construction is very pleased to announce that we have started construction on an infill custom home that has been designed by Harry Schrader with Schrader Design, Inc. We will be working on this custom residence for approximately the next twelve months. We are very excited that we will be part of the team. Below are some plans for the custom home! Keep reading to follow our progress. We will be posting updates throughout the year following the building process of this home. 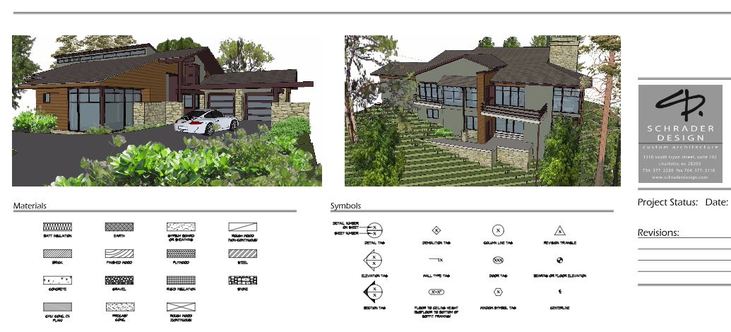 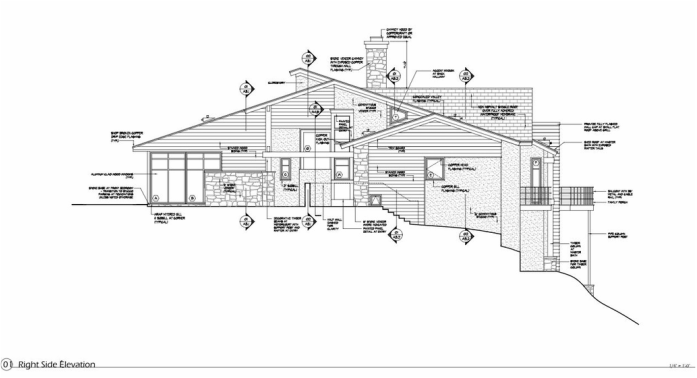 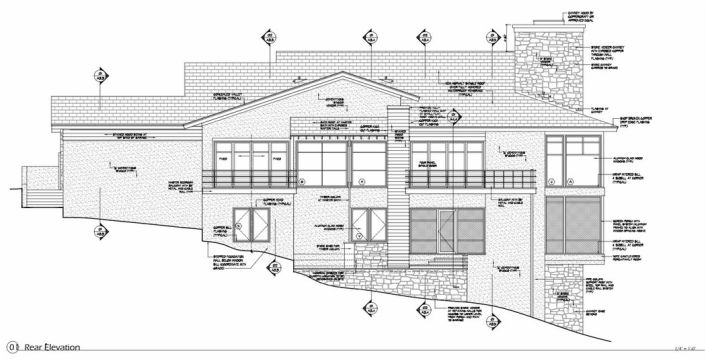 The client selected JBC to construct their custom residence on a home site that they had purchased. Schrader Design was hired by the client to bring their dreams to reality. Schrader Design has done a great job of designing this residence so that fits in very well with it’s natural surroundings. This home site has some complicated elevations that had to be taken into consideration while being designed. We thought that it would be educational to take pictures and post them with a written description of what it is involved in building a truly designed custom residence on an infill lot in town. Harry Schrader will be offering his own perspective on how the relationship and the design came to fruition. After experiencing a record amount of rain in the month of November 2015 and a near record amount of rain in the month of December 2015 we were very excited that we were not under construction but were putting the finishing touches on pre construction activities such as securing a building permit from the county, finalizing our construction specifications and the job estimate. We hoped that when we were ready to start that the weather would cooperate. Mother nature did her part to allow us to start site preparation the second week of January 2016. We felt pretty lucky to have five straight days of cold dry weather. This is pretty important when working on site preparation, as almost any precipitation will shut us down due to the soil having so much clay in it. Once that red clay dirt gets wet it becomes too challenging and slippery to work with. We have taken some pictures showing what the home site looked like before we started construction (it’s always a good idea to photograph the home site in advance to any work commencing, especially if you have neighbors very close by and the lot lines are pretty tight). Here are some pictures of the “yellow toys showing up”. This is always the honeymoon stage of construction for us. It makes me feel like I’m back in the sandbox in my back yard growing up. We have taken some pictures of what the home site looks like once the “yellow toys’’ have done some work. We found a few surprises along the way (not highly unusual for any infill home site) of very large pieces of concrete that were in our excavation area that had to be hauled off as well as an existing concrete block wall that wasn’t noticeable before clearing. Now that we have cleared the vegetation away from the property line not only is it not very attractive but also it’s failing. The back portion of the wall will also be in conflict with our new design. This will be a topic of conversation with the client and the architect at our weekly site meeting as to if we think we can work with it and dress it up or remove it and not incur any structural surprises with it down the road. 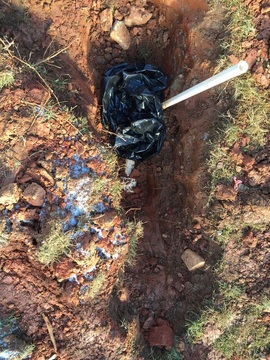 That is the sewer tap that we dug up. We always try and find the sewer tap on every infill job before we finalize where the finished floor elevation is to be set so that we can make sure we will be able to get the sewer to work by gravity to the tap and not incur the cost of having to pump it. It’s not unusual on infill lots that over the years sanitary sewers were added at a later date (previously septic) and sometimes those sewers run much more shallow than one would think. We have learned over the years to not make any assumptions as to where the elevation of the tap may be, everyone knows what happens when you make assumptions. Often times if the sewer tap is shallow you may be able to adjust the finished floor elevation to allow for gravity to work by setting the house higher. In our case with this residence we look like we will be able to make it work without having to set the house too high and make it look awkward in its natural setting. We consulted with our plumbing contractor to get a feel of how much fall on the sewer they will need from the bathroom furthest back in the house to where they will be bringing it to exit through the foundation wall at the front of the house when they come to rough in the plumbing under the main floor. From there we finalized our finished floor elevation allowing for enough fall from the foundation wall to the sewer tap. We then met on site with the client and the architect showing them where the top of the foundation wall needed to be to make it work with gravity. We have taken some pictures of several stakes that we placed on site indicating where the proposed finished floor elevation would be. Orange ribbons on the stakes indicate this elevation. From the top of the foundation wall we added our math in for the framing portion of the floor system as well as the thickness of the finished floor to get to the finished floor elevation. We used these stakes and ribbons at the site meeting with the client and the architect to help everyone visualize where the house will be set at. This is a very important part of the custom home building process. Everyone needs to be very clear where this final elevation will be and comfortable with how it will impact the final grading, elevation of the driveway, drainage, etc. It also impacts the site work budget in terms of dirt needing to be exported or imported. If the client and or architect are expecting the house to be set much lower than anticipated not only will there be a cost to pump up the sewer but you can expect to export a good bit of dirt. If the client and or architect are expecting the house to be set much higher than anticipated then you can expect to import dirt. Both of these scenarios would require budgetary conversations to take place before finalizing the house setting. At the site meting with the client and the architect it was determined that the wall we had uncovered had to come down. There really was no way around it. Our client contacted the two neighbors to discuss the situation. Both of the neighbors were very reasonable, acknowledging that the wall was on our clients property but they appreciated being involved in the conversation. We placed some orange construction fencing in one of the neighbors yards to deter their small children from “coming over to visit”. The other neighbor has two dogs that are used to being fenced in by the wall. We installed a temporary chain link fence to keep the dogs corralled until a permanent fence can be constructed. So far the relationship between us, our client and the neighbors seems to be going pretty well. It pays to be proactive in these conversations we’ve learned. Thanks for reading! We are excited to continue to post pictures so you can walk through the custom build process with us!
2 Comments
2/3/2020 01:22:18 pm
This is so interesting!! Very neat perspective and informative. Your work is stunningly great! Beautiful lines and amazing designs. Thanks for posting! Leave a Reply. |
About JasonWith over 25 years of home building experience, Jason Barwick has earned the reputation as an extremely knowledgeable builder in the Carolinas. 
Categories |


 RSS Feed
|
Member of the National Association of Home Builders
Member of Home Builders Association of Charlotte Certified Green Professional Designation Custom Builder for the McLean Community Copyright 2020 • J Barwick Construction • Phone: 704-201-7696
|
|